Showing posts with label creative taxidermy. Show all posts

Thursday, January 9, 2014

Bring it on 2014!

Cheers to a hugely successful 2013!

It's been just over one year since the launch of this blog, and I'm pleased to say that, not only have I been updating regularly (OK so the updates dried up after October... I also work full time!!), but I managed to keep both of the New Year's resolutions I'd declared for my artistic ambitions many months ago. Besides meeting my stated goals of improving my crafting & taxidermy skills and displaying my creations at a local art show,  I've also put together a Facebook page as well as an Etsy shop.  Things are going quite well, and with 5 Etsy sales and 10 admirers in about a month, I am confident that the ChupacabraCrafts Empire will continue to grow ;)

Proof that not all of my friends are dead animals
This past summer I joined a group of local artists, tattooists, photographers, and skateboarders for a huge warehouse party aka Free Art Show.  For the first time my paintings, prints, jewelry, gift boxes, (in hind sight I brought WAY too much shit) and earliest taxidermy pieces were on display for the public eye.

Self-promotion can be a challenging skill to learn.  For introverts like myself, it can be down right terrifying. On top of that, not everyone you meet actually likes taxidermy. On more than one occasion I've been insulted, called "creepy" to my face... and so on. Luckily, at this event my style was undeniably well received and I made many new contacts, gave away plenty of stickers and business cards, and even sold some prints & jewelry. It was an amazing time and the show turned out to be a huge success for everyone involved. Additionally, a small posse of my Eastern MA crew turned out to show their TLC. <3 <3 <3

The best part for me was just sitting back and watching peoples' reactions to my work. Dozens of kids whipped out their smart phones to take pictures of my taxidermy and turtle-hide boxes. For some reason I love the thought of my art being passed around the internet, even if my name isn't plastered across every single snap shot. Of course, a part of me wants to hoard every last bit of recognition and credit, but a larger part of me is happy to remain anonymous.

Now here's a bunch of pictures from the past year.  Thank you, everyone, for your support, encouragement, critiques, and love.


My display @ Free Art Show

The creative taxidermy of Chupacabra Crafts

I painted some foam core and made a display!


My paintings about to be framed...


Squirrel Foot boxes

Made my own stickers!


My latest mount!

The artist at work...

Friday, October 25, 2013

Feeling Chipper

I threw myself into chipmunks for the sake of an adorable little boy who hunted one down about a month ago. My boyfriend and I were actually visiting an old, local-ish, professional taxidermist who had made us a gorgeous black bear rug from last season. We visited his studio - a barn in the beautiful, autumn Western Mass countryside - and I was able to pick his brain about taxidermy methods and licsensure application info.

On our way out we happened upon the elder taxidermist's son and young grandson. The kid was proudly showing off the female chipmunk he just hunted with his own rifle. He pleaded with his grandpa to stuff it for him (his younger sister was horrified), but the man proclaimed "they're just too small, it can't be done. At least not by my old eyes." The boy was clearly dissapointed, but I excitedly jumped at the chance to prove my budding skills.

"I can do it!"  And so I claimed my first true hunter and customer.

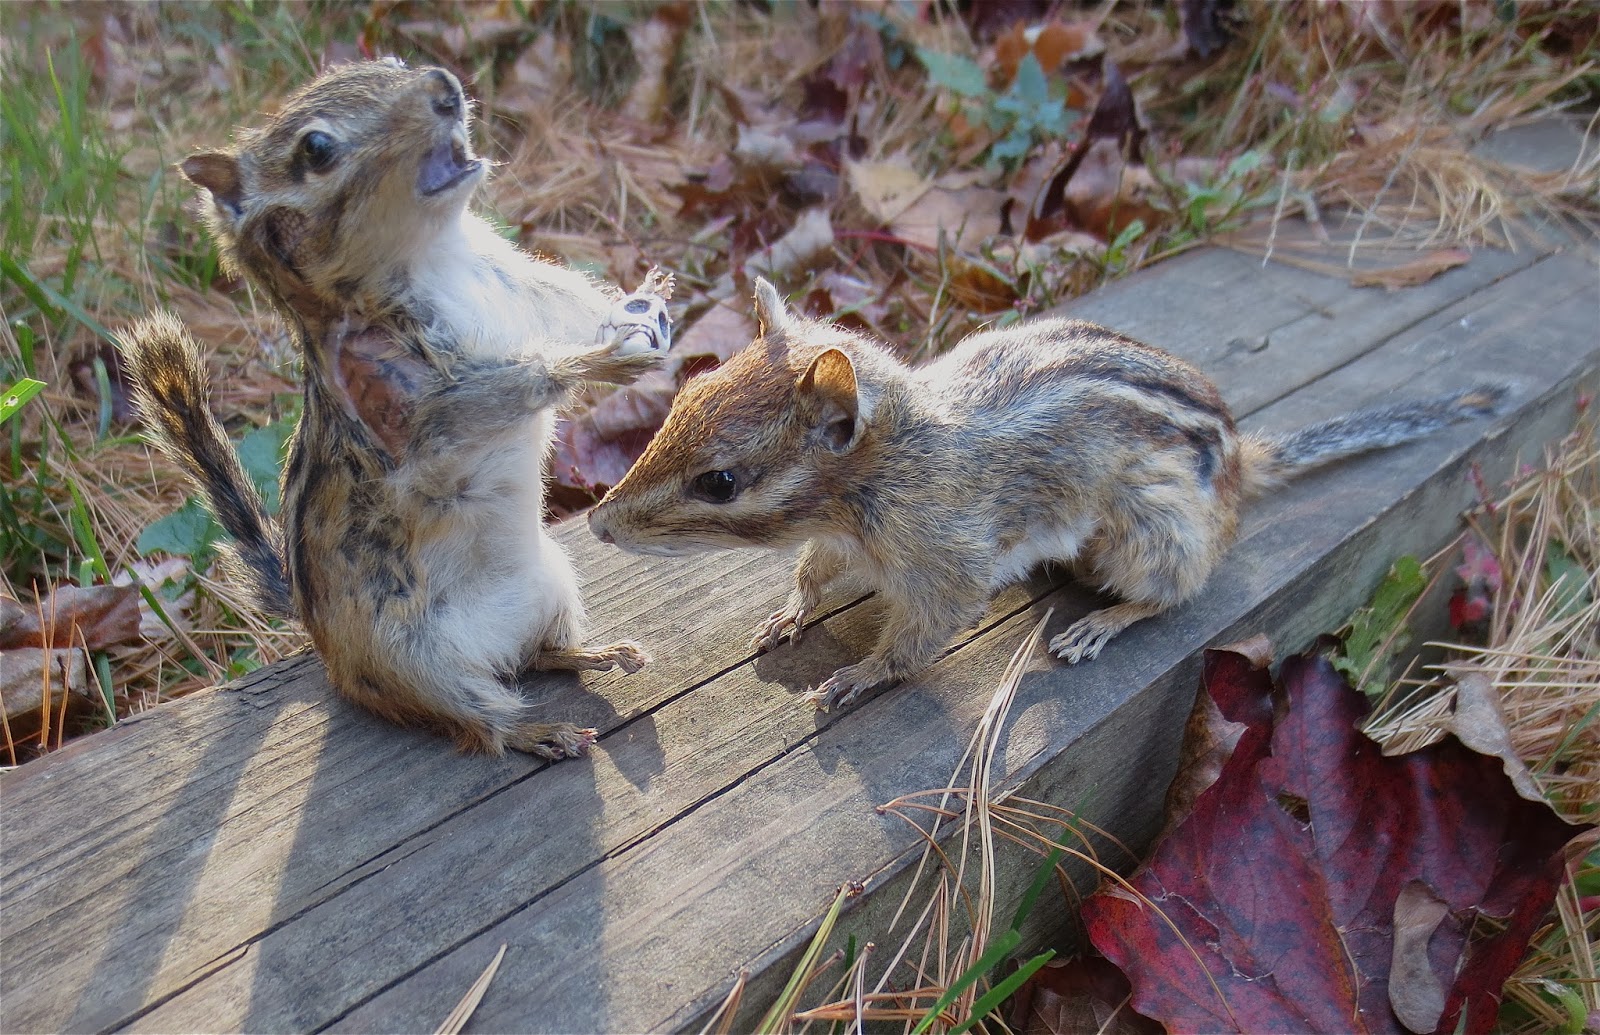
So for the past few weeks I've been working on eastern chipmunks Tamias striatus. They are amazingly difficult to stuff successfully, given their diminutive size and thin skin.  It was easy to see why even experienced taxidermists would avoid them. In 3 weeks,  however,  I was able to mount 3 chipmunks - 2 of which came out good enough to post pictures of!

The following is a general breakdown of my technique:

Make a plan: Envision what the final piece will (hopefully) look like by drawing a few simple sketches. Sketching helps me center myself and get into art mode.

Organize your materials:  Mannikins of several sizes, 'munk pelt, wad of critter clay, cotton balls, instruments, needles & thread. A few things I wish I'd put in this photo are: small paint brushes, paint, glass eyes, and a product called "bird foot injection fluid".


Figure out how to the get pelt on the mannikin: As far as I can tell, and even according to the pro I spoke with, this often involves breaking the legs off the mannikin. This time it occoured to me to make subtle notches in the limbs to help them fit snugly back together. The little boy's chipmunk also had a bullet hole in one of its arm pits which turned out to be a great place to insert the severed forearms.


After the forearms are in place carefully insert the rest of the mannikin. (in the case of these 'munks the hind legs didn't need to be removed.) This is a difficult step and it is easy to fuck up and tear the wet skin or rip the fur out. 


Carve out the eye sockets of the form, insert black bubble eyes.


Using a combination of clay and cotton balls, I built up the brow, under eye, nose, ear bases, whisker roots, cheeks and lower jaw.  Using tweezers I insert small balls of clay or cotton under the wet skin and work them into shape. This is my favorite part of the taxidermy process; trying to create a lifelike expression. 

However I'm still trying to learn to add enough clay compensate for the natural shrinkage that occurs as the mount dries. Their faces look perfect at first, but begin to warp and tighten over the first several days post-creation. Adding to this dilema, when the skin is first mounted (and I double checked this with our bear rug maker) it should be sopping wet and workable, that is, saturated with water and slightly pudgier than it would be if still alive. Maintaining the look of realism through out the wet-to-dry process still needs to be mastered. 


So.... I got lazy stopped taking pictures of the final steps. That can wait for future posts. What's missing are positioning the paws and tail with clay and wire, injecting foot-preservation fluid (smells awful, a mask must be worn) into the paw pads, and painting a bit of color around the mouth and eyelids. Time it sit back and enjoy the fuzzy fruits of my labor. Thanks for reading :)


This one's pelt ripped. Patched it up with chicken-patterned paper.


Spooky & Kid Stuff


Tuesday, August 13, 2013

Funny Bunny

Minor update: After much feedback I decided to patch him up with some spare printed canvas:


Saturday, August 3, 2013

From lawnmower victim to adorable desktop companion...

This tiny cottontail was an accidental victim of the grounds department where my bf and I work...he was thoughtful enough to acquire it for me ^.^

Here's something I'm quickly learning about taxidermy: tiny animals are fucking difficult. Their skin is very thin to begin with and the tanning process can ruin the strength if not done extremely carefully (I over-neutralized a squirrel pelt recently and large patches of fur fell out). Never-the-less this little fellow came out pretty good, minus the gaping tear in his right side. The rabbit kit was skinned, the feet and adorable little tail were left on, and into the pickle jar it went. The skin was so thin it clearly pickled through in only about 2 hours. 

A first I tried simply stuffing the sock-like bunny with just cotton balls, but it didn't hold much of a shape.  I pulled out most of the cotton balls, except for the neck and head which looked decent and was starting to dry in place. I then constructed a lovely little wire frame and messed with it and the cotton balls until, after a few solid hours of work, I had recreated the baby bunny. 


Tuesday, July 9, 2013

Squirrel in the Living Room!

Pleased to announce the results of my first attempt at a life-sized taxidermy mount!


Ooooooo!
I spent most of July 4th hanging out with friends in my backyard; grilling, celebrating, and putting this guy together. Lord Julius IV: Order of the StumpTail a.k.a Mr. Fuzzynuts was found whilst cleaning out a basement  freezer, leftover from last fall's grey squirrel season. He had taken some serious shotgun damage to his right eye socket and was missing most of his tail to begin with, but I figured what the heck good enough to practice a first piece! And so the squirrel was thawed, pelted, and pickled. 


Pickling
At this point I've skinned enough small mammals that it was fairly simple to get the hide off and mix the very acidic hide preserving solution. Since I didn't have a specific pose for the mount in mind, a case incision was used to remove the skin in one piece. A squirrel hock-to-squirrel hock cut was made, passing under the base of the tail, along the grey-white fur line. This was to ensure that the final stitches wouldn't be seen by the audience.  After about an hour the skin  -including all 4 feet, ears, nose and whiskers- was freed from the body. It peeled off a bit like a tube sock. As the skin soaked overnight, I picked out a pretty generic mannikin, or foam taxidermy form, and several sizes of glass rodent eyes. 


One big mistake I made overall was failing to measure the whole animal from nose to the base of the tail, and the width and length of the eyes prior to skinning. When the foam body arrived and I excitedly began putting the skin on, it quickly became obvious that the hide (basically sopping wet after being rinsed/neutralized of acid and coated/rinsed again of hide tanning agent) was about 3 inches too long to fit snuggly against the form. The squirrel's rear end hung limply off the foam body like a tattered cloth. In addition the arms and legs of the animal looked disproportionately long when affixed to the nubs of the mannikin. Admittedly, I was feeling pretty discouraged at this point. Despite reading and re-reading the Mannual, there seemed to be just too many fine nuances to taxidermy art to simply describe to a novice. For example: just exactly how much bone and tendon should one leave intact in the paws in order to balance shape, correct preservation, and still avoiding rot? I sat back for a while and debated how best to proceed. However, time was limited as the hide began to dry to the form and needed to be shaped into a final lifelike position...


Tanned,  hydrated hide and mannikin with foot glued back on


While struggling to mount the hide I stupidly snapped off the bottom right paw of the mannikin. The moderately brittle foam crumbled apart in my hand and all I could do was sit back and groan in frustration. While waiting for the glue to dry on the severed foot my mind scrolled through all the animal-stuffing techniques I'd been reading about. Around the house there was a decent collection of wire, glues, cardboard, and clay, but I didn't have the straw or sawdust old timers used for making taxidermy forms. As I worked outside on the deck, friends stopped by to inspect my progress and I smiled awkwardly, pretending to be in control of the situation.

After a good half hour of thinking it over I came up with a plan of action. Basically, it was a crude combination of all the methods I had been reading or youtube-ing. At this stage the face skin had been drying in place nicely and I didn't want to undo it. The mannikin was wearing the skin like a hooded cloak. I went back and snapped off all four paws. Then I used 22 gauge wire to fashion four 6" long arm and leg frames which were stuffed back up under the hide, in its "armpits". I began stuffing cotton balls as far as I could up into the armpits, trying to hold the wire in place without glue. Surprisingly it worked as I had hoped and the little beast's right forearm came back to life in proportion (more or less) and semi flexible.... there was hope after all!

I excitedly finished the other three limbs in the same manner. Bulking up his waist with cotton was the next step, probably the most fun and amusing part of the project. I then sculpted the overall shape of the animal by pushing and sculpting the pelt and cotton around by hand. When I was satisfied with the body composition I gently sewed up the original incision sight. I also worked the ears, nose, whiskers and lips into their final shape. His right eyelid was long gone so I couldn't get really creative with eye expression, but his lower lip was a different story. I gave him a comical gasping expression, representing my first attempt at mounting a small animal that was full of unexpected challenges.

All in all I spent close to 5 hours straight taxidermy-ing this grey squirrel. Later that night I realized we had tanned a spare tail from another squirrel my hubby had also shot last season. I carefully fed a piece of wire into it and tied it tightly to the mount's tail stub.  I adjusted the tail to a pleasant S shape and the piece instantly seemed to take on a new life. "Squirrel in the living room!" I thought at last.

 The next day I was looking the mount over and came to the realization that he needed teeth. At first I tried clipping the teeth out of an old vole skull, but they turned out to be much too small to fill the squirrel's mouth convincingly. (I also had painted the inside of the mouth greyish-brown, along with a few patches of missing fur) The solution was clearly to make some incisors out of sculpy, and after a few layers of paint he had some fairly convincing dentures. Just a hint cartoony, but that's how I like it.


Lord Julius IV, Order of the StumpTail


Dental Plan

patch of fur slip :(

Party UP

Friday, June 21, 2013

Facelift for a Classic Souvenir


We picked up this little fellow at a yard sale the other day. You may have seen these minimally processed dried pufferfish in sea shell stores at various ocean vacation locales. Typically, they are stuffed with cotton and finished with googly eyes, a string to hang them from, and/or a little straw hat. Come to think of it, I may have some left over from childhood lurking around my folks' house....


 This was a simple notion that sprung into my head several months ago. I was hoping to buy one of these dried puffers over the summer, but unexpectedly stumbled upon this guy instead. The idea is just to give him a "face lift" or change of expression by replacing the standard googly eyes with high quality glass fish eyes from the taxidermy supplier.


The first step was to clean him up with a damp paper towel. You can see how dusty he was in the first picture. Cotton was also spilling out of his mouth and had to be poked back down into his gullet. His tail fin had several tears in it and I was contemplating soaking the tail and trying to repair it, but decided to just leave it as is. Without knowing how the dead fish was preserved, I couldn't estimate how well it would tolerate full rehydration and clearly I didn't want to risk causing the piece to rot...


I carefully pried off the original eyes using a dull scalpel blade. Next, I tried out various pairs of glass eyes that had been ordered from a taxidermy supplier.  Several weeks beforehand I selected a dozen pairs of fish, reptile, and novelty eyes just to have around the house for when Inspiration hit.


In the end I chose 10mm alligator eyes because of their soft, green hue and slightly evil gaze. They were about 4mm larger than his googlies, and at first gave him a really bugged out appearance. It was obviously to me that they needed sockets, which I delicately cut out. All said & done, the whole craft took about half an hour and the results were quite impressive, in my opinion. His name is now Lord Puffington V.