Sunday, May 11, 2014

Pictures & Such!

Happy Spring & Happy Mother's day to you!

It's been a busy and exciting season for us so far. We're in the midsts of a couple of exciting projects!

Several weeks ago I dropped by the ol' game club after the last pheasant hunt of the season, returning home with a huge bag of raw feet. I cleaned & preserved them with borax, transforming the claws into a series of gemstone pendants. Check them out for sale on the ChupacabraCrafts Etsy Shop!


Amethyst Window Stone

Pyrite Cube

Hematite


Blue Aventurine 


Also of note,
Started this Dermestid beetle culture about 8 days ago:


And Finally got some better pictures our pet skunk taxidermy!


Cheers!


Monday, March 10, 2014

Stuffed a Skunk!

This fellow has been in the works for a while now,  his name is Mulligan:

Back in November a friend's father called us and asked if we'd be interested in picking up the body of a pest skunk he was attempting to capture and cull. The unsuspecting creature had been living under this elderly couple's porch and uprooting their gardens. My boyfriend and I excitedly agreed to retrieve the kill, innocently wondering "How much will it smell?"

Theoretically it is possible to take down a skunk without triggering it to spray by means of a carefully placed .22 to the brain. And I would love to say that that's exactly what happened to this chap, but we arrived on scene to find the poor beast had been shot in the lower jaw, triggering an awful, yet karmic blast of skunk anal juice. Lovely.  My Love then delivered the killing shot, and we were left with no good options. 99% of people in this situation would probably have tossed the body anywhere remotely feasible, but by that point I just couldn't accept the idea of throwing out the skunk carcass. First of all, the pelt itself was lush, thick and healthy -- despite the oder. That, and I just found the little beastie to be so amazingly cute! Thus, with little time to deliberate, we put the reeking body in the back of our pickup and returned home with our.... prize.

Once at home I set up outback --in the farthest corner of the yard-- with a small table and my least favorite/easiest to part with scalpel, knife, and clothes. I donned rubber gloves, an N95 mask, and a face shield.  Being that close to fresh skunk spray was something like being in a cloud of rancid onions and spilled gasoline. It was just so awful, I had to take frequent breaks because I kept getting light headed. Breaking out the camera for close up shots was absolutely out of the question. However, I was still determined not to waste the animal's pelt no matter how awful the task of skinning it would be. Even if it couldn't be mounted, the hide could at least be chemically tanned and displayed in the backyard somewhere.

While I was setting up outside, my boyfriend was inside doing some quick internet research on skunk anal gland removal. Thanks to him, YouTube, and  this excellent, magical video I was able to learn how to removed the other anal gland without rupturing it (they generally let loose one at a time), but it still took me nearly two hours to work the stinking, extreamly greasy skin off the animal. After a while I was simply too nauseated to detail out the feet, remove the toes bones, and scrape the thick layer of blubber off the inside of the skin, so I bagged it up and put it in our small "to be taxidermied" chest freezer. Unfortunately, with the exceptionally strong New England winter coming on, I was forced to put all my large, messy, "out doors" taxidermy projects on hold for the season. So I carefully placed the triple-bagged and inside-out skunk skin on the top of my To Do pile and slowly closed the freezer door. I felt vaguely uneasy about the whole situation....

Umm.....yeah....


All seemed well until mid December, when I ventured down to that corner of the basement and whereupon I noticed a particular funk in the air. The skunk's smell was penetrating through the freezer and possibly through everything else that was individually labeled and bagged in that freezer! Panicking, I took the bagged skunk skin out of the freezer and ran out side with it, tossing it in a melting pile of snow and ice on the corner of our deck. It was about 8 o'clock on a Saturday night and there was nothing that could be done besides throwing the skin in the trash, but I was still determined not to let that happen.

The next day I woke up early, got my supplies together, and proceeded out back to continue fleshing the skunk skin. My boyfriend and I assembled a crude fleshing station out of a series of PVC pipes of various sizes and, mask and all, I went back at it. Much time was spent skinning the paws and each individual toe, except the last toe joint (containing the claw) which is left attached to the skin. After a few hours I was satisfied with the job and continued on to the next steps.

The skin was then soaked in a solution of water and "De-greaser" for about an hour. The degreasing agent is something like a heavy duty shampoo that cleans a lot of the natural oils out of the skin and fur. After the first 1/2 hour I had to change the solution because the particularly oily skunk skin turned the first batch a sickly yellow-green color.

The next step was to soak the hide in an acidic pickling solution over night. The next day I took the skin out of the pickling bucket, drained it briefly, and repeated the fleshing, scraping, and picking process over again. In the near future I'm going to invest in a handheld mechanical fleshing blade, because an ordinary skinning knife at this stage is very time consuming. However, proper removal of the flesh and fat from the internal side of the skin is needed to allow the actual tanning chemicals to be absorbed during the next step in the process.

His cute little forepaw!
After the final pickling, the skin was neutralized in a sodium bicarbonate and water solution and then coated in the syrupy tanning agent. The product I use contains formalin and must be used outside, while wearing a mask, and with common sense & safety in mind. Just enough of the product is brushed onto the skin so that it is completely absorbed in 4-5 hours. During this time the flesh side of the pelt turns very light in color and is starting to finally look like actual leather.

I rinsed the skin in water one final time and began to turn it right side out. With great care I reversed the stubby legs and instantly fell in love with his cute little claws. I excitedly turned the rest of the skin, something like a soaking wet towel that still smelled like skunk. The face popped out and looked fantastic. After all that practice on squirrels, I was able to flesh off his eyelids, ears, and nose with relative ease. However his lower jaw (where he'd first been shot) looked shrunken up and mutilated. Something would have to be done to mitigate the appearance of that. But overall, the skunk hide was beautiful, thick and shiny. The project was going to look great, even if the smell of skunk was still.... fairly evident. The pickling & tanning process hadn't removed the skunk's oder as much as we had hoped. At this point we were kind of stuck, and so "Mr. Stinky" was hung in the farthest corner of the tool shed to dry out.

A fortnight passed and the skunk skin dried and contorted. I checked on it regularly and shaped the face, nose, and claws repeatedly during the process to keep them in decent shape for whatever the final piece was going to be. Cartilage and tendon do not rehydrate very well, and past experience has taught me to get the general shape of the ears, lip line, eye openings, and any remaining toe bones right "the first time" before any initial drying out of the skin.

We figured that drying the pelt out would help the scent dissipate, and we were right... until the day came when I decided to rehydrate the little fella and finally turn him into something. After only half an hour of rehydration in a bucket of briny water, that familiar fragrance returned to the air. Fortunately the odor was relatively mild this time, like what you might whiff during an after dark neighborhood jaunt in spring. It wouldn't have been that big a deal if only I'd been working outside, but I had set up in the basement to avoid the January elements. Never-the-less I was determined to create something out of the skin over the course of that day.

His felt jaw is drying. 
My boyfriend initially requested something wearable, presumably a hat or scarf. But it was clear at this point that we simply couldn't make the skin into anything that anyone would want to wear on themselves; anywhere, anytime, ever.  He was a bit dsissapointed, but I was getting excited because I really wanted to try to make the skin into a soft mount. I've always wanted a pet skunk and this would be the next best thing! Soft mounts -also known as "plushie" taxidermy- are a modern take on the old, crude methods of preserving animal skins and literally stuffing them with scraps and rags, in general while paying no attention to anatomy or final appearance of the hide. Today soft mounts are made by using the head-only mannikins that are used to make animal rugs, while filling the rest of the body with a light wire frame and synthetic teddy bear stuffing. Like traditional taxidermy, there is a wide variety in the quality of soft mounts available for sale. If you're interested soft taxidermy of unparalleled artistic skill, visit Urban Nature Taxidermy Studio.

Anyway, I set out to stuff our new pet skunk. Given the critter's short legs and overall simple, tube shaped body, mounting it was a fairly quick and simple process:

1. Each toe tip was filled with a tiny portion of air drying clay. Next the limbs were packed rather tightly with poly stuffing. I nixed the idea of crafting a wire frame due to the over all stumpy shape of the beastie.

2. I sculpted the shape is his head and snout as the leather dried (no one manufactures skunk head mannikins), taking a hair dryer to it very briefly to speed up the process. Then I glued his 8mm glass bubble eyes into place.

3. Next I began to add stuffing to the neck, being careful not to give him a stretched out appearance. The rest of the body followed, though I decided to leave little gaps of no stuffing at the junctures of his limbs and body. This left his arms and legs delightfully dangly.

4. I continued to add small handfulls of stuffing until he seemed to be the "right" amount of stuffed - not too hard, not too floppy. I sewed his case incision back together - that's ventrally, between his hind legs and across his butt. The tail was left unstuffed and unwired to give him a mellow, pet-like personality.

5. Finally I patched up his chin and made him a very simplistic lower jaw out of black felt. Now at long last, our skunk had been given a second chance at.... life!


Need to take some better pics when the nice weather gets here!


Mr. Stinky aka Mulligan 


thanks for reading! 


Thursday, January 9, 2014

Bring it on 2014!

Cheers to a hugely successful 2013!

It's been just over one year since the launch of this blog, and I'm pleased to say that, not only have I been updating regularly (OK so the updates dried up after October... I also work full time!!), but I managed to keep both of the New Year's resolutions I'd declared for my artistic ambitions many months ago. Besides meeting my stated goals of improving my crafting & taxidermy skills and displaying my creations at a local art show,  I've also put together a Facebook page as well as an Etsy shop.  Things are going quite well, and with 5 Etsy sales and 10 admirers in about a month, I am confident that the ChupacabraCrafts Empire will continue to grow ;)

Proof that not all of my friends are dead animals
This past summer I joined a group of local artists, tattooists, photographers, and skateboarders for a huge warehouse party aka Free Art Show.  For the first time my paintings, prints, jewelry, gift boxes, (in hind sight I brought WAY too much shit) and earliest taxidermy pieces were on display for the public eye.

Self-promotion can be a challenging skill to learn.  For introverts like myself, it can be down right terrifying. On top of that, not everyone you meet actually likes taxidermy. On more than one occasion I've been insulted, called "creepy" to my face... and so on. Luckily, at this event my style was undeniably well received and I made many new contacts, gave away plenty of stickers and business cards, and even sold some prints & jewelry. It was an amazing time and the show turned out to be a huge success for everyone involved. Additionally, a small posse of my Eastern MA crew turned out to show their TLC. <3 <3 <3

The best part for me was just sitting back and watching peoples' reactions to my work. Dozens of kids whipped out their smart phones to take pictures of my taxidermy and turtle-hide boxes. For some reason I love the thought of my art being passed around the internet, even if my name isn't plastered across every single snap shot. Of course, a part of me wants to hoard every last bit of recognition and credit, but a larger part of me is happy to remain anonymous.

Now here's a bunch of pictures from the past year.  Thank you, everyone, for your support, encouragement, critiques, and love.


My display @ Free Art Show

The creative taxidermy of Chupacabra Crafts

I painted some foam core and made a display!


My paintings about to be framed...


Squirrel Foot boxes

Made my own stickers!


My latest mount!

The artist at work...

Friday, October 25, 2013

Feeling Chipper

I threw myself into chipmunks for the sake of an adorable little boy who hunted one down about a month ago. My boyfriend and I were actually visiting an old, local-ish, professional taxidermist who had made us a gorgeous black bear rug from last season. We visited his studio - a barn in the beautiful, autumn Western Mass countryside - and I was able to pick his brain about taxidermy methods and licsensure application info.

On our way out we happened upon the elder taxidermist's son and young grandson. The kid was proudly showing off the female chipmunk he just hunted with his own rifle. He pleaded with his grandpa to stuff it for him (his younger sister was horrified), but the man proclaimed "they're just too small, it can't be done. At least not by my old eyes." The boy was clearly dissapointed, but I excitedly jumped at the chance to prove my budding skills.

"I can do it!"  And so I claimed my first true hunter and customer.

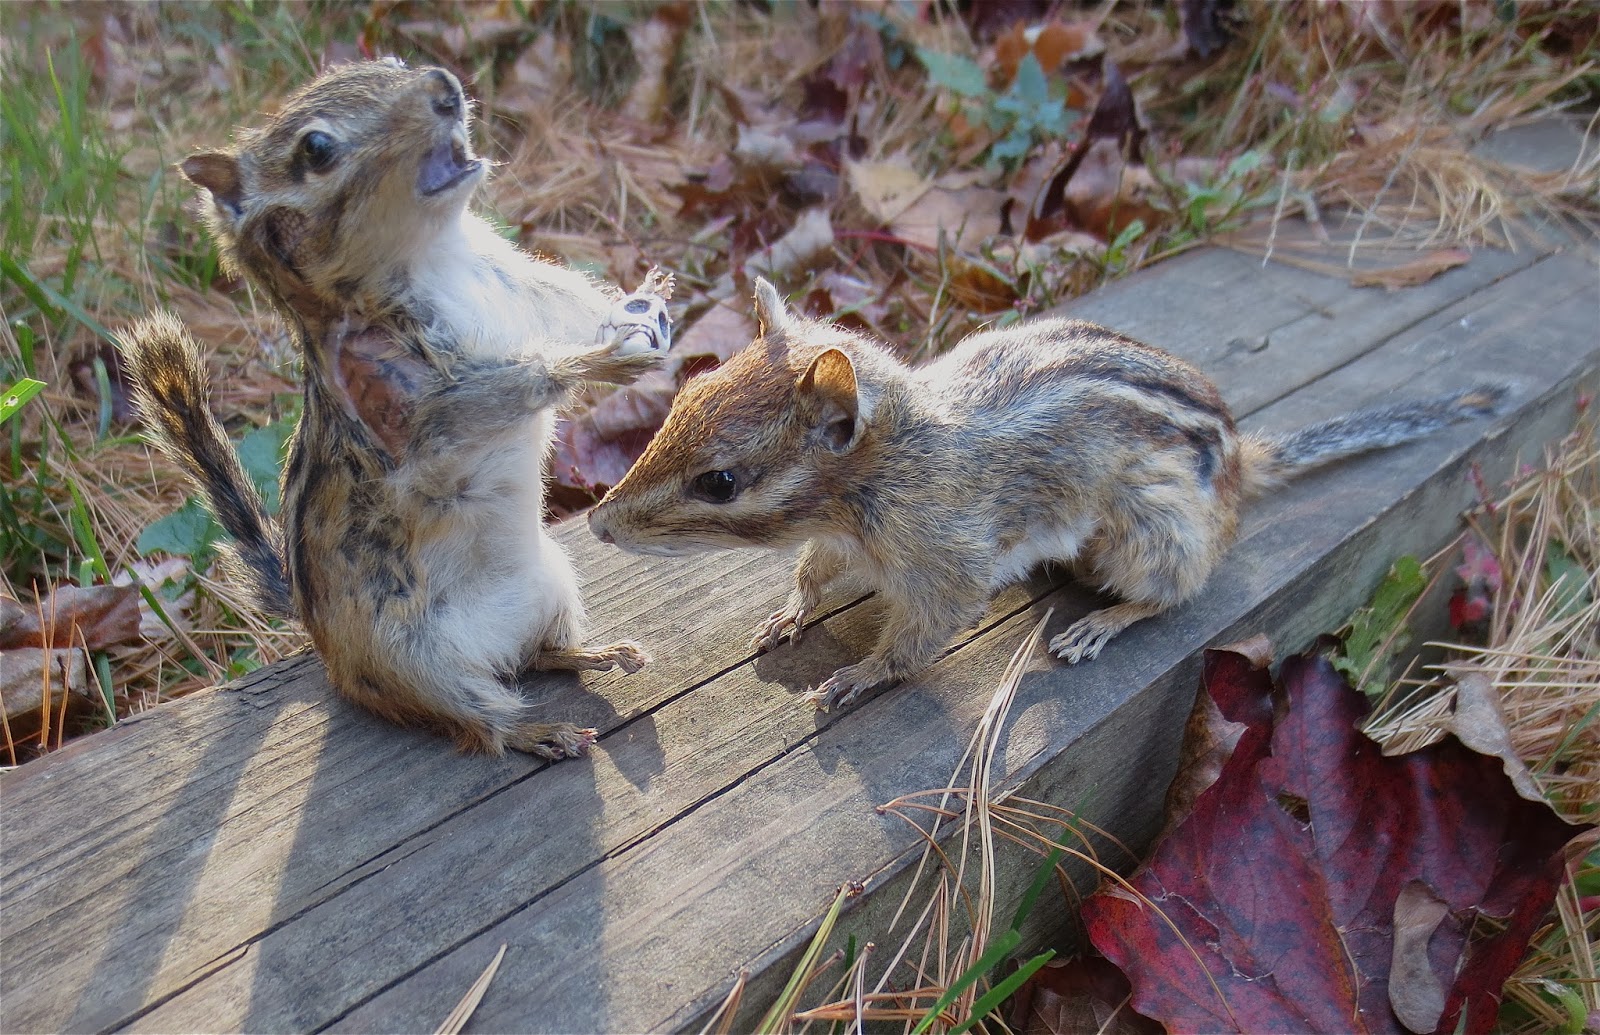
So for the past few weeks I've been working on eastern chipmunks Tamias striatus. They are amazingly difficult to stuff successfully, given their diminutive size and thin skin.  It was easy to see why even experienced taxidermists would avoid them. In 3 weeks,  however,  I was able to mount 3 chipmunks - 2 of which came out good enough to post pictures of!

The following is a general breakdown of my technique:

Make a plan: Envision what the final piece will (hopefully) look like by drawing a few simple sketches. Sketching helps me center myself and get into art mode.

Organize your materials:  Mannikins of several sizes, 'munk pelt, wad of critter clay, cotton balls, instruments, needles & thread. A few things I wish I'd put in this photo are: small paint brushes, paint, glass eyes, and a product called "bird foot injection fluid".


Figure out how to the get pelt on the mannikin: As far as I can tell, and even according to the pro I spoke with, this often involves breaking the legs off the mannikin. This time it occoured to me to make subtle notches in the limbs to help them fit snugly back together. The little boy's chipmunk also had a bullet hole in one of its arm pits which turned out to be a great place to insert the severed forearms.


After the forearms are in place carefully insert the rest of the mannikin. (in the case of these 'munks the hind legs didn't need to be removed.) This is a difficult step and it is easy to fuck up and tear the wet skin or rip the fur out. 


Carve out the eye sockets of the form, insert black bubble eyes.


Using a combination of clay and cotton balls, I built up the brow, under eye, nose, ear bases, whisker roots, cheeks and lower jaw.  Using tweezers I insert small balls of clay or cotton under the wet skin and work them into shape. This is my favorite part of the taxidermy process; trying to create a lifelike expression. 

However I'm still trying to learn to add enough clay compensate for the natural shrinkage that occurs as the mount dries. Their faces look perfect at first, but begin to warp and tighten over the first several days post-creation. Adding to this dilema, when the skin is first mounted (and I double checked this with our bear rug maker) it should be sopping wet and workable, that is, saturated with water and slightly pudgier than it would be if still alive. Maintaining the look of realism through out the wet-to-dry process still needs to be mastered. 


So.... I got lazy stopped taking pictures of the final steps. That can wait for future posts. What's missing are positioning the paws and tail with clay and wire, injecting foot-preservation fluid (smells awful, a mask must be worn) into the paw pads, and painting a bit of color around the mouth and eyelids. Time it sit back and enjoy the fuzzy fruits of my labor. Thanks for reading :)


This one's pelt ripped. Patched it up with chicken-patterned paper.


Spooky & Kid Stuff


Monday, October 14, 2013

Rest in Peace, Mr. Balls.

Mr. Balls was your typical over-the-counter pet store hamster. Scientifically speaking, he was Mesocricetus auratus - the Syrian hamster. Outwardly, however, he was a rather poor specimen. He was small - barely 90 grams, and he had an underbite which caused his ever-growing rodent teeth to curl against each other in odd, tusk-like formations. His teeth were monitored and clipped into a respectable shape every few weeks throughout his hamstery life. Mr. Balls died at the age of 2 3/4 years. We held onto his body down in our carcass freezer for a long time. The day finally came when I felt confident enough at small animal mounting to thaw it out, remove and treat the pelt, and attempt to stuff it....


Firstly, I constructed a wire & cotton frame, somewhat like I had done with FunnyBunny.  This was done as the pelt was soaking in the pickling agent.


After a few days the pelt was ready to be carefully applied over the frame.


It took about 2 hours of arrangement, but I was able to mount with skin, add the eyes and a bit of clay for support, and set the piece to dry. As a finishing touch, I positioned the digits on his left paws to be throwing the Horns: 


Monday, September 9, 2013

The Faces of Progress

Just completed my fourth squirrel mount, which is also my fifth work of taxidermy for the summer! This piece, dubbed Wednesday,  I will confidently claim, turned out really really good:


Looking over the whole group, particularly the details of the faces, my progression in the hobby is most pleasing...lol to me. Perhaps most importantly, I am perfecting the early but vital step of removing the skin from the skull without damaging the inner ears, eyelids, whisker roots, nose and lips. Of these features, the eyelids are probably the most easily damaged and easily observable. On poor Lord Julius, for example, I skinned/fleshed the left side of his face respectably, but utterly butchered his right side:

Lord Juilius IV, Order of the StumpTail


Ouch!


However, Wednesday's eye-setting came out beautifully. Two distinct improvements in craftsmanship added to her success. Firstly, I carved the eye sockets much deeper into the mannikin before gluing the glass eyes in place. The epoxy-foam mannikins come with shallow eye sockets, but its up to the artist to detail them to the individual specimen in a (hopefully) realistic manner. The other new technique that worked well was stuffing the brow with tiny bits of cotton after I'd slid the hide more-or-less in place.


A few weeks after Julius, I got a roadkill connect that turned out to have been a lactating female with a pretty shitty quality pelt to begin with. However, for the sake of practice I took the animal and experimentally stuffed it pillow-style, without any sort of mannikin or wire frame, just to see what the final product would look like. She ended up essentially still looking like roadkill, but quite deserving of a place on the internet:


As for my third squirrel, I decided to get creative (I'm having a hard time convincing myself to make "normal" looking mounts) and pose him holding his own heart, preserved in a little jar. Thus, I carefully cut out his heart and preserved it in a small glass jar of 70% alcohol. The jar was an empty paint jar form the art supply store.  Now preserving rodent hearts in tiny jars is something I've been dabbling in since college. After 3 or 4 days/alcohol changes, the heart tissue, still submerged in EtOH, was fixed.

Things were going well on #3 until it was time to close up his ventral incision. The hide simply wasn't big enough, possibly because I'd gotten lazy and had let the hide dry out completely before rehydrating (soaking it in briny water overnight) and mounting it. But I was not discouraged, in fact this was the perfect excuse to make the final creation nice and strange. I debated between carving the exposed foam to look like the underlying anatomy or something a bit more.... whimsical.

With the recent success of FunnyBunny, I decided to take a similar route with this squirrel, i.e. to my trove of decoupage materials. A Victorian-like black & white flower-patterned sheet of paper was selected. I used just a small portion of the sheet and tore it up randomly to get the look I wanted. Next came the modge podging, which proceeded in two layers; a base layer of the less attractive paper scraps, followed by a select group of scraps carefully placed over the torso to give the impression of the rodent's original organs. In the end, it was a huge success:

He needs a name.


heart-in-a-jar

I carved him a pleasant smile.


And that brings us up to Wednesday, who is thus far the beauty of my collection. I crafted her in essentially the same manner as Julius; that is mannikin + cotton filler. In this case my boyfriend and I picked out an interesting mannikin in a climbing down, turning slightly to the left pose. One thing I prepped for was arm breakage. In this instance it occurred to me to try cutting off the mannikin's arms at the shoulders and inserting them into the skin's leg holes first. This actually turned out to be a great strategy and I was able to mount the hide fairly quickly.

There isn't much more to add to her story at the moment, though we are on the look out for the right base or log to put her on. Don't mind the cotton visible in the pics below, she's still drying. Other than some lower lip shrinkage and some hair-slip at the base of the tail, the finished piece looks fantastic. Wednesday also came with her own ear notches, which I think adds to her natural charm.